User Management — User Manual
Also searched as: deactivate user, remove user, delete user, change someone’s role, manage team, block user, user list, resend invite, edit user.
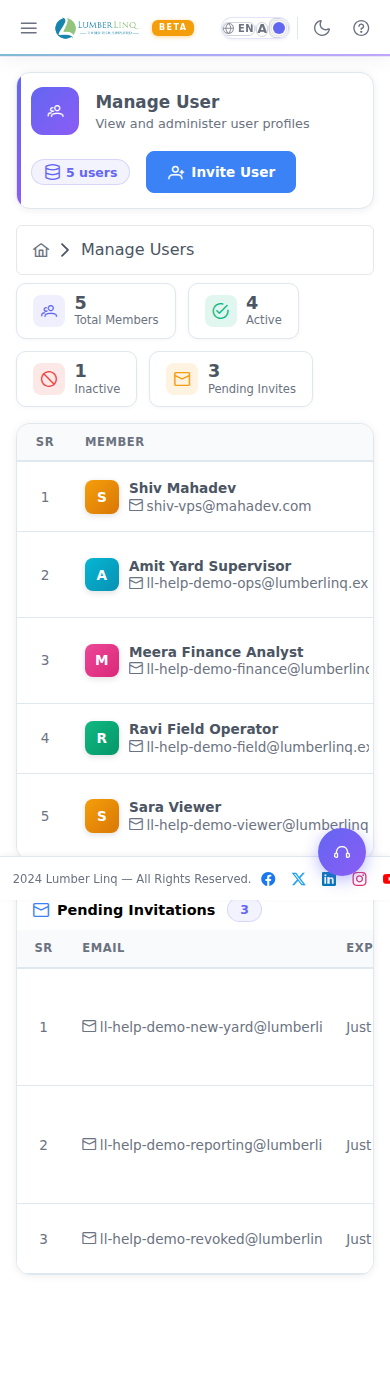
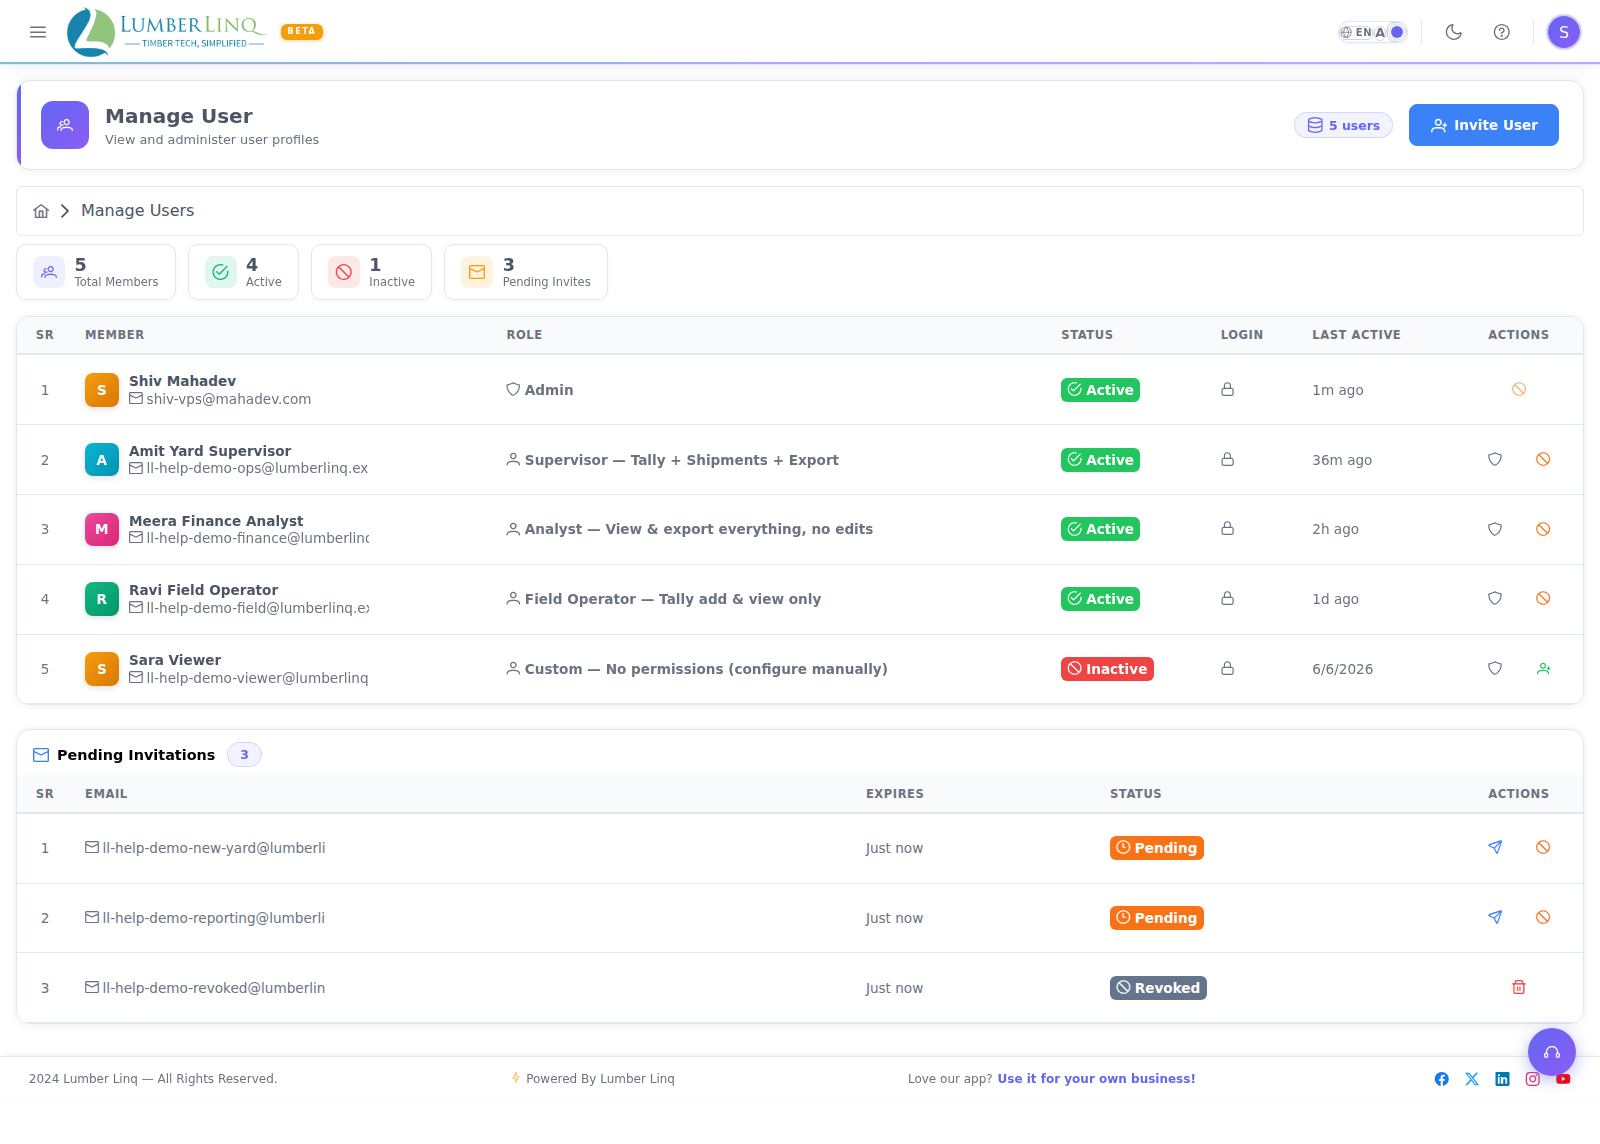
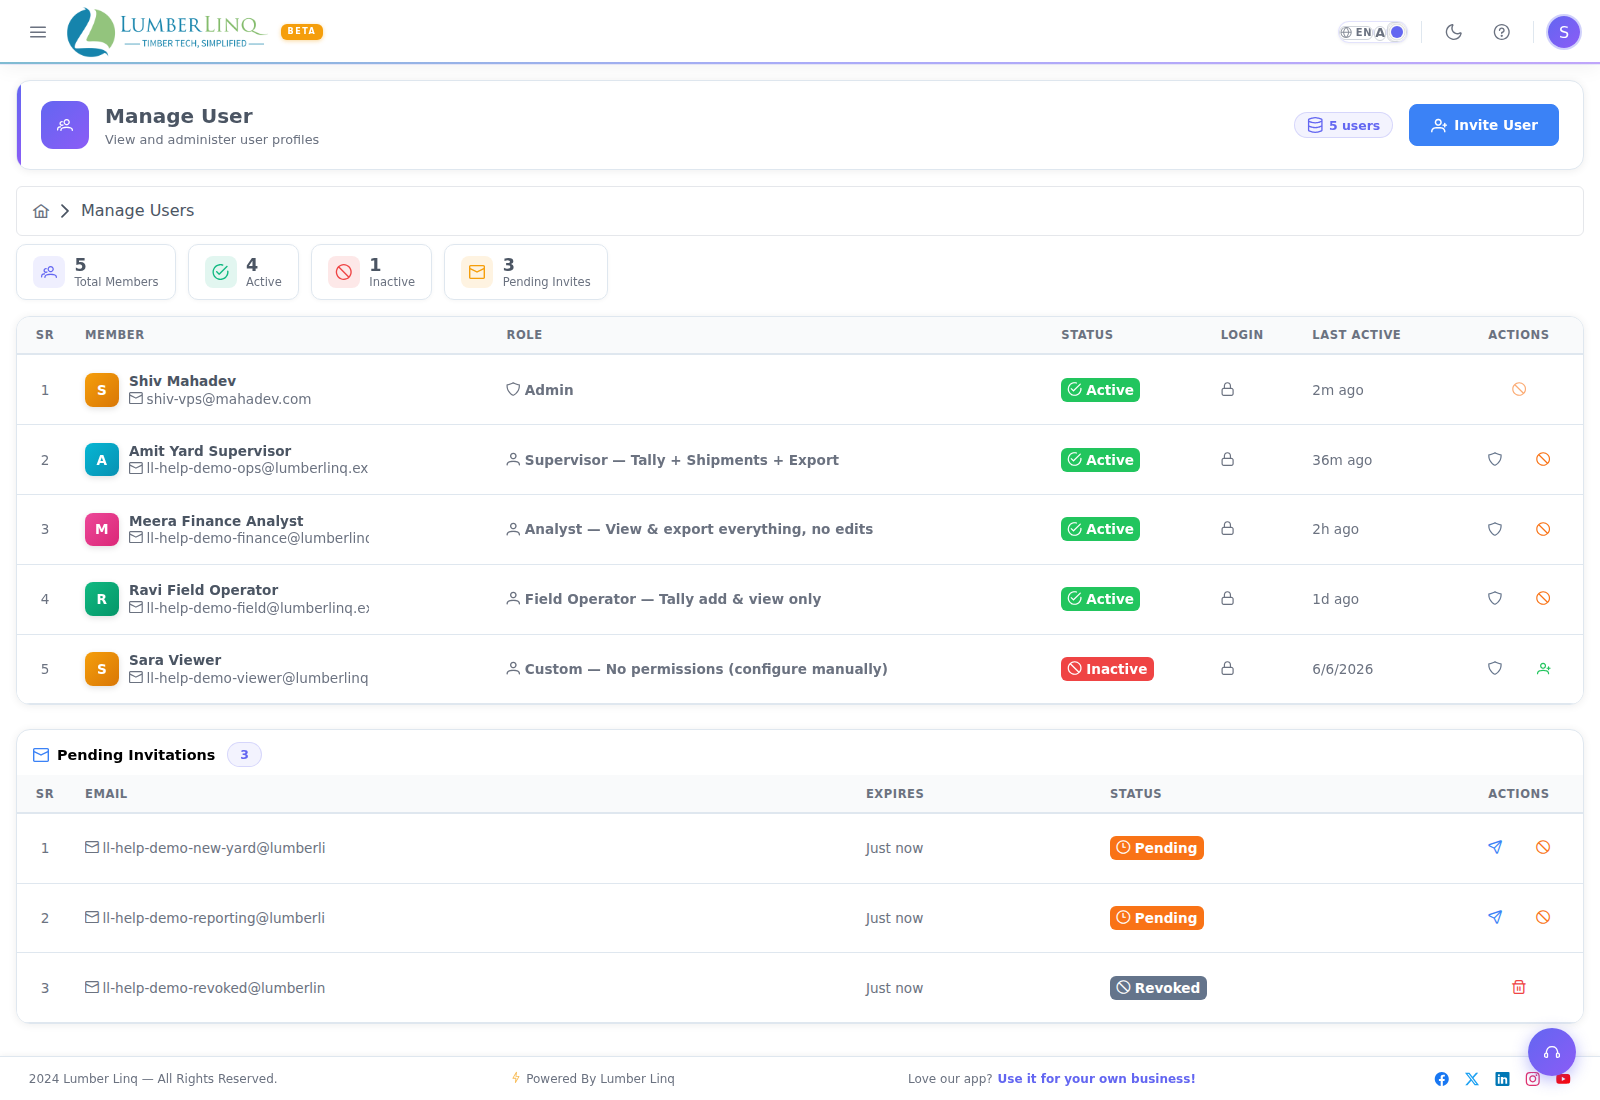
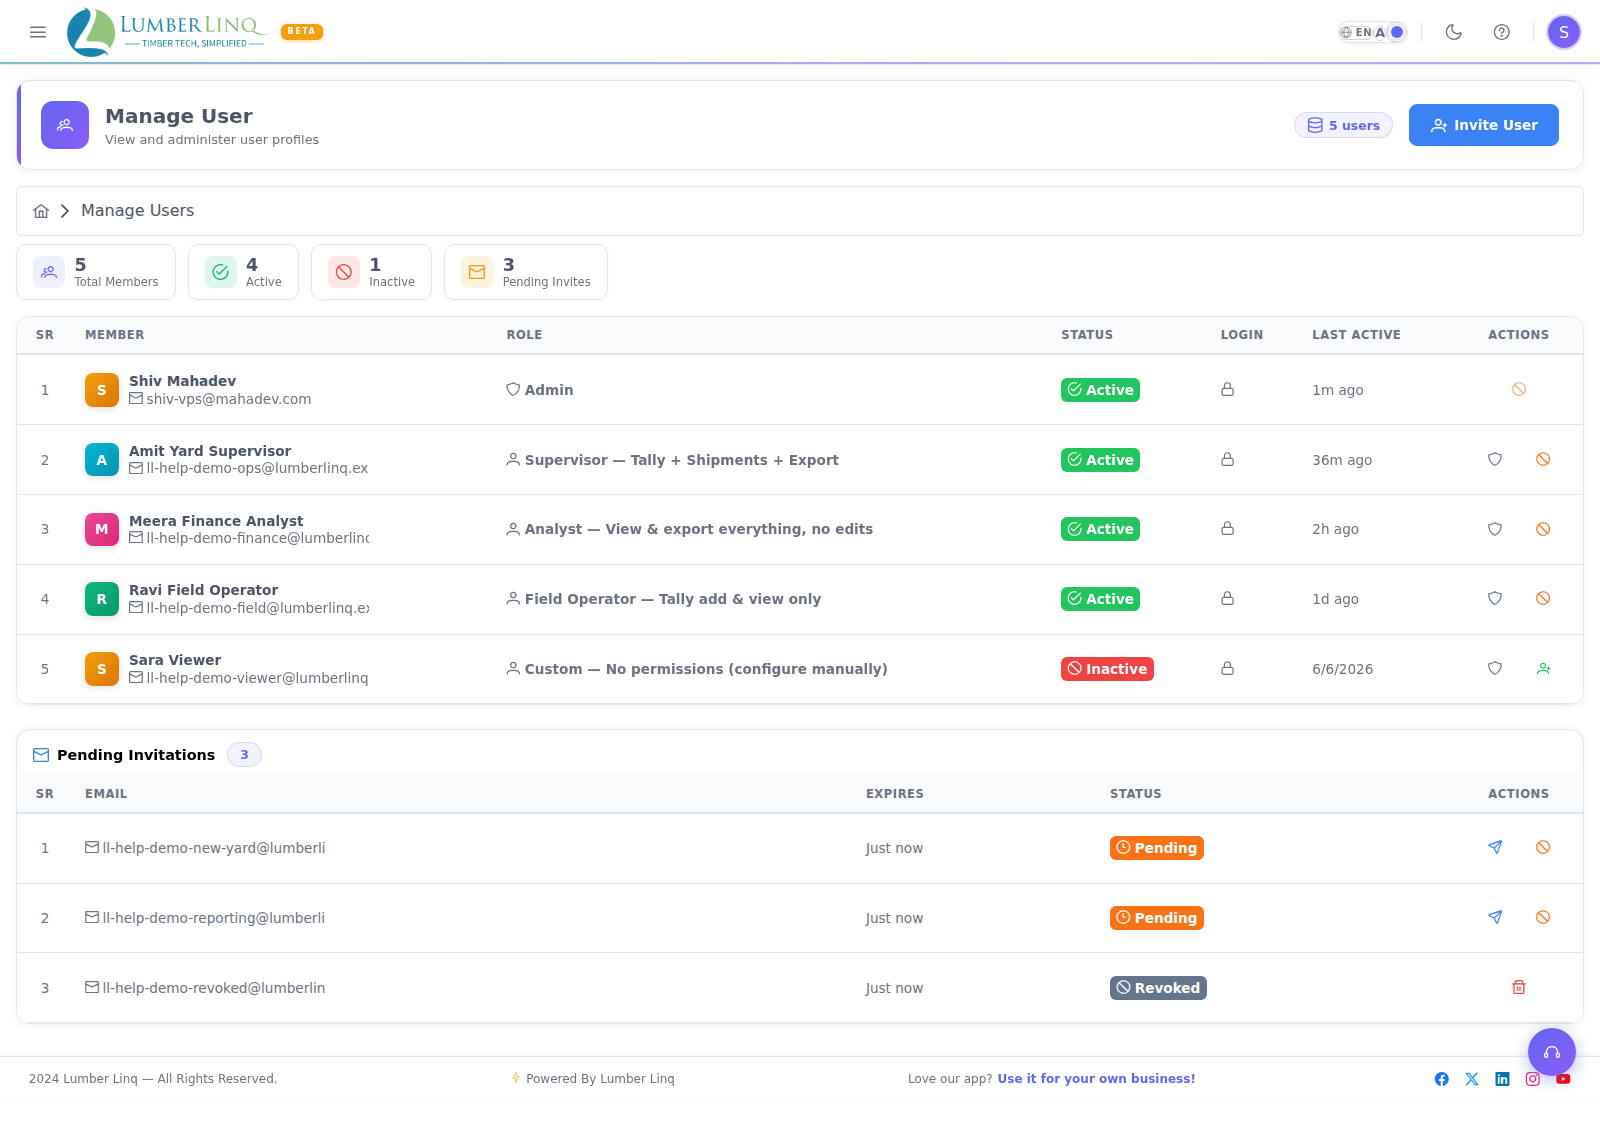
Open Main Menu → User → Manage User to view all users in your company account, their roles, and their status. This page is only available to ADMIN and SUPER_ADMIN roles.
Roles in LumberLinq
| Role | Description |
|---|---|
| USER | Standard team member. Can access modules their permissions allow. Cannot manage other users. |
| ADMIN | Full data access. Can invite/manage USER-role members. Can configure RBAC permissions. |
| SUPER_ADMIN | All ADMIN capabilities plus can create ADMIN-role users. |
There is also a platform-level ROOT role used only by LumberLinq support staff — not available to company users.
Role-Based Access Control (RBAC) Permissions
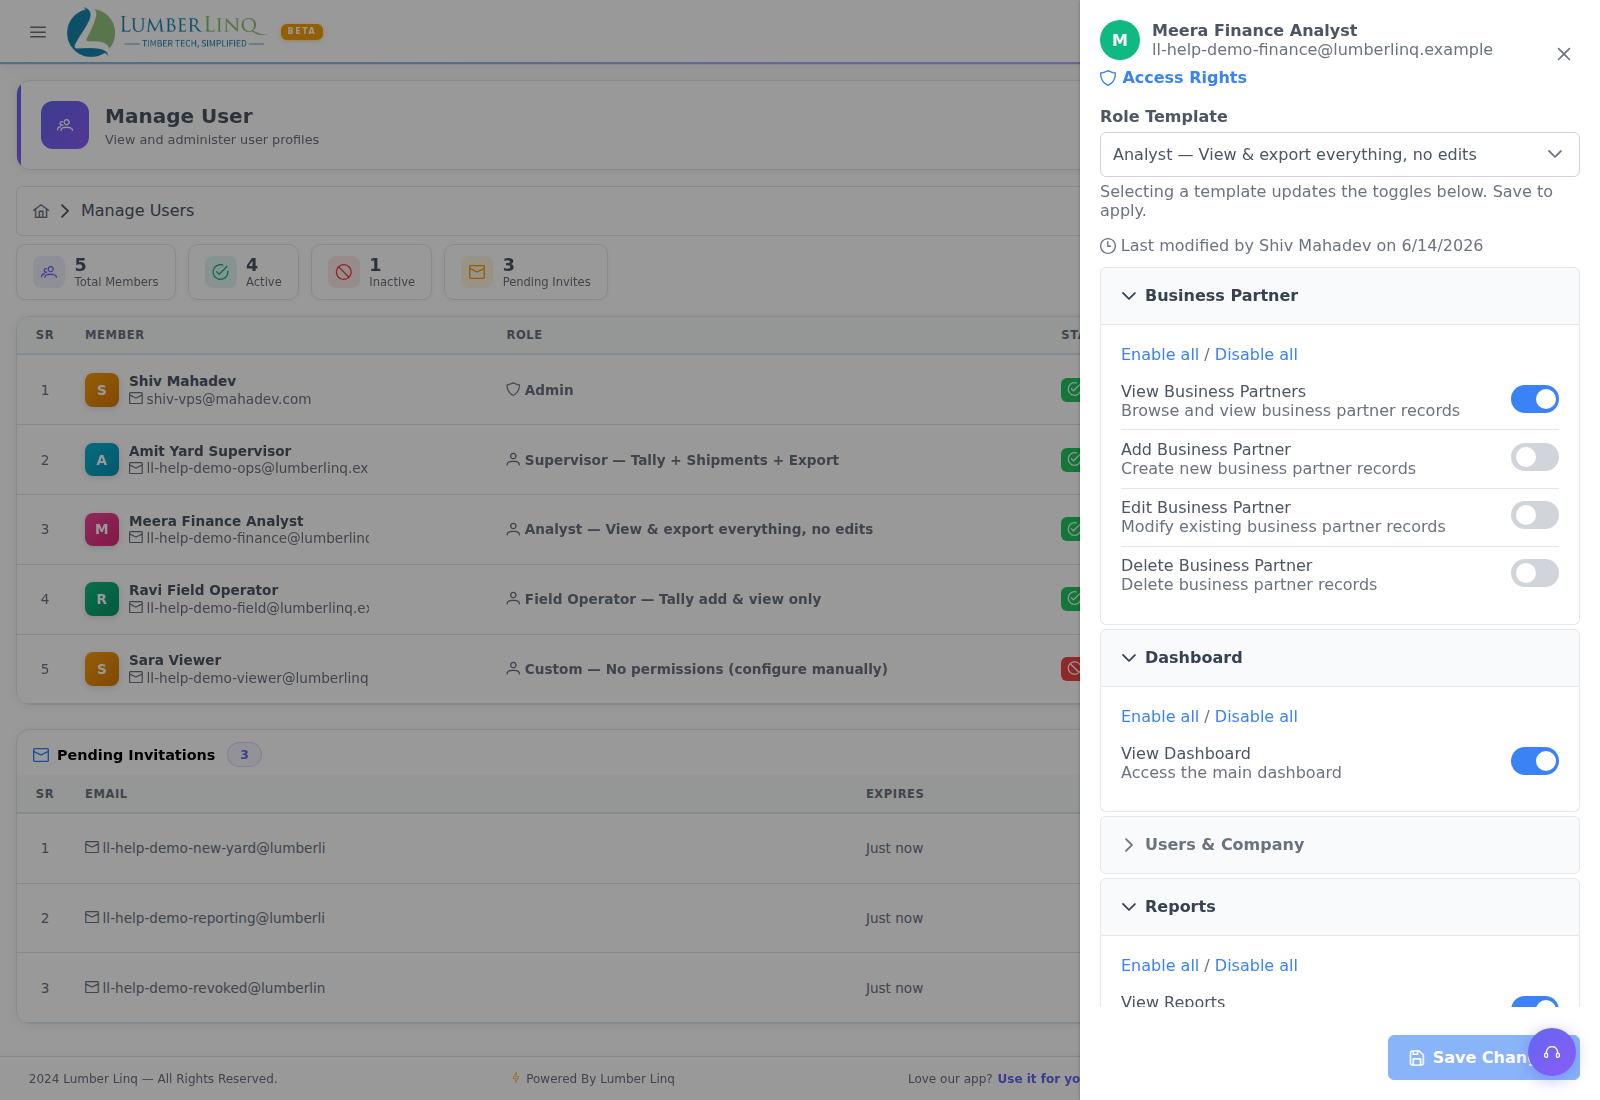
For USER-role members, access to each module is controlled by individual permissions, grouped into 12 modules in the Access Rights panel: Dashboard, Tally Sheet, Consignments, Business Partner, Products, Locations, Reports, Storage, Inventory, Process, Support, Users & Company.
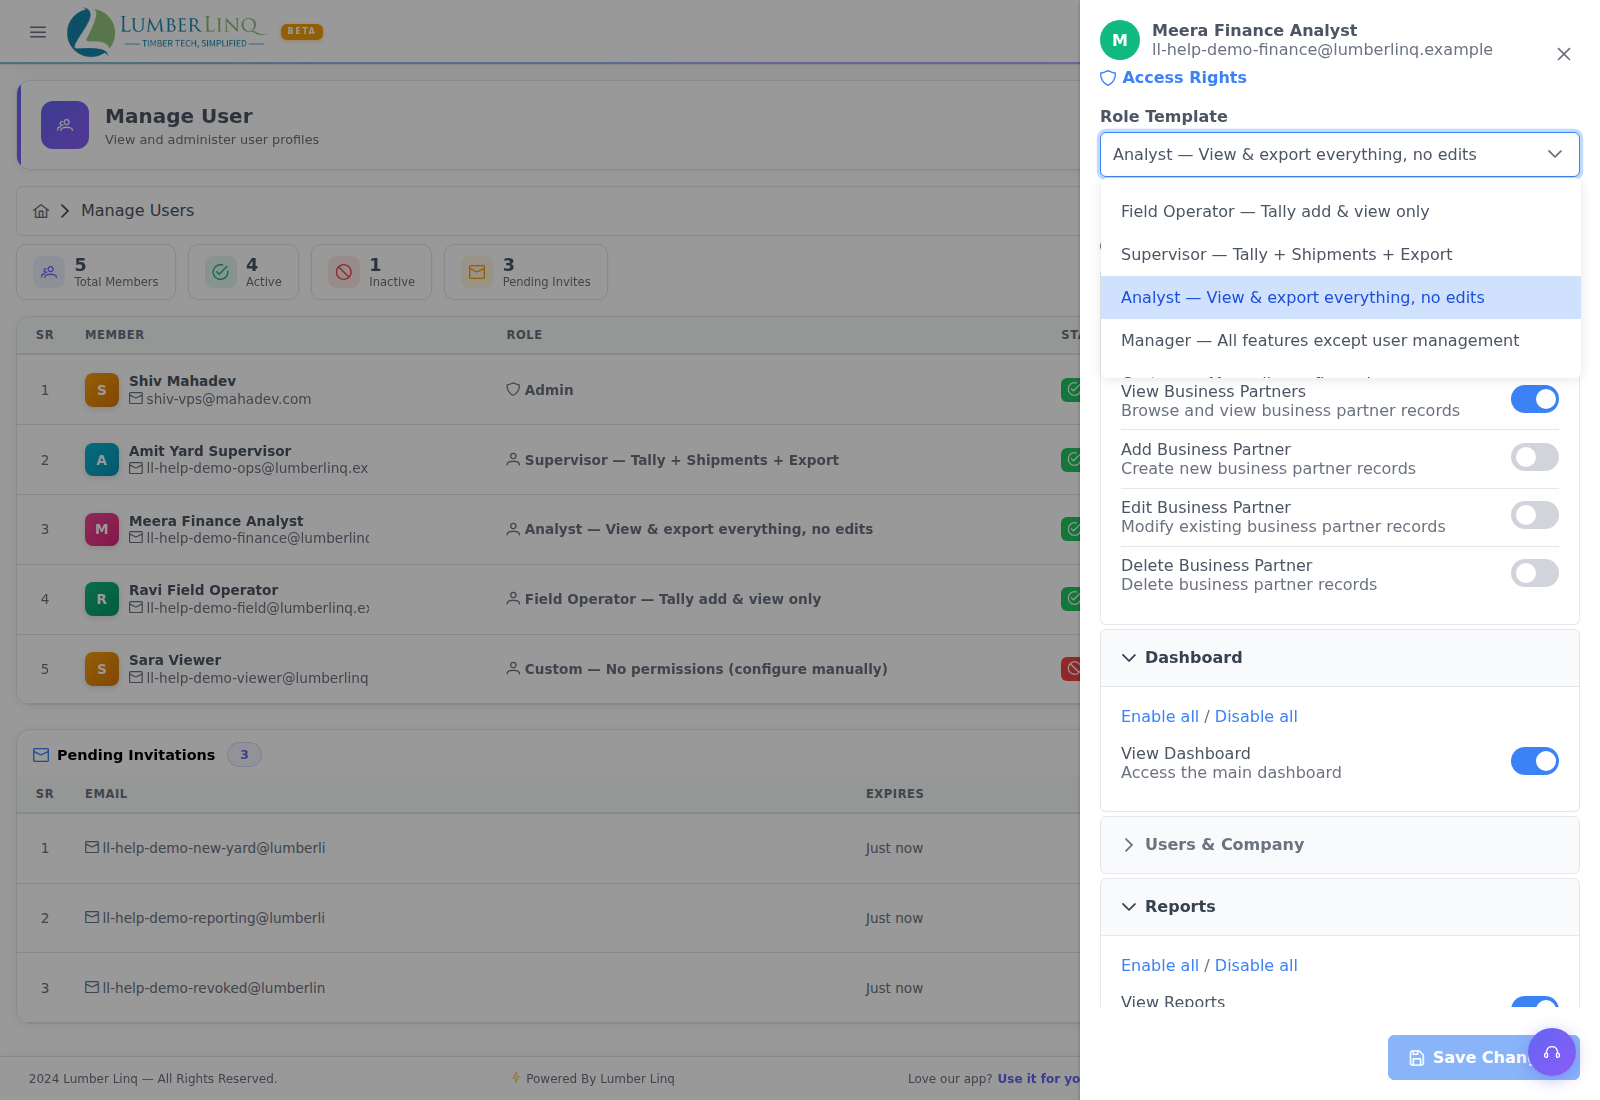
Instead of configuring these one user at a time, an admin can also create a reusable Access Role (e.g. “Accountant”) with a fixed set of permissions and assign it to any number of users — see the RBAC & Access Roles guide.
ADMIN and SUPER_ADMIN bypass RBAC — they have access to everything regardless of permission settings.
Inviting a New User
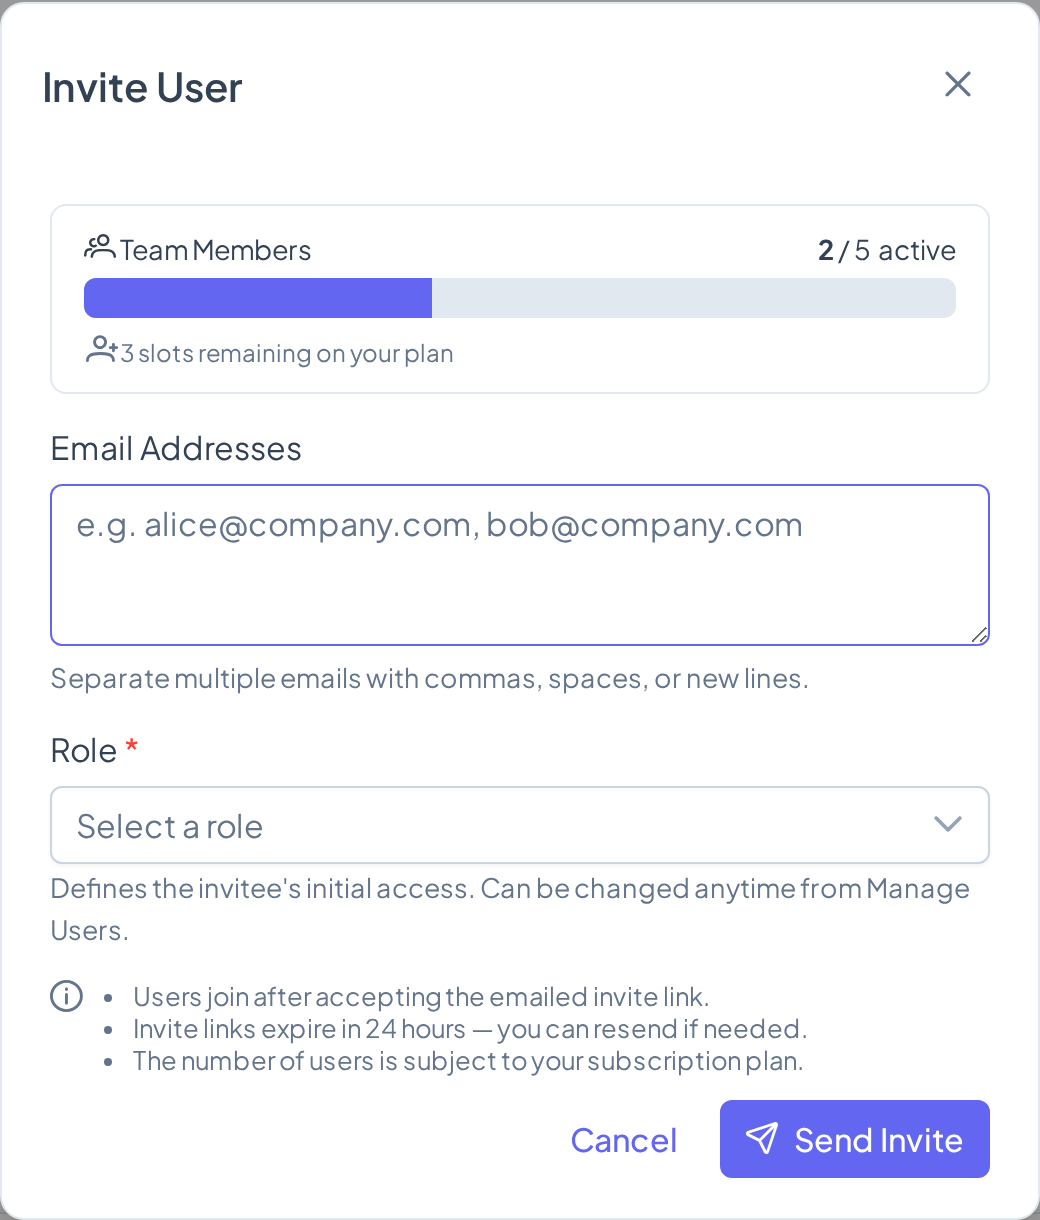
See the Inviting Team Members guide for the full invitation flow.
Summary: Manage User → Invite User → enter one or more emails, choose Admin/an Access Role/Custom Access → Send Invite. The user receives an email with a registration link (expires in 24 hours).
Editing a User’s Role or Permissions
- Go to Manage User.
- Click the edit icon next to the user.
- Change the role or toggle permissions.
- Save. Changes take effect on the user’s next page load (their existing session is not immediately invalidated).
Making and Removing an Admin
Owners and Admins can give another team member admin rights, or take them away, from Manage User. On a member’s row use Make Admin (or Remove Admin); on a phone these are in the row’s menu. The buttons only show when you are allowed to use them.
- Make Admin asks you to confirm: the person gets full admin access to this company, including managing users. You can remove it later.
- Remove Admin asks you to confirm: the person stays in the company as a regular member but loses admin access.
Rules that always apply:
- The company Owner’s admin rights can never be removed by anyone.
- At least one active Owner or Admin must always remain. An admin can remove their own admin rights only if another Owner or Admin remains.
- A removed admin stays in the company as a normal member.
- It only changes the role in this company — the same person’s role in another company is not touched.
Deactivating a User
Deactivating blocks the user from logging in without deleting their data:
- Manage User → find the user → click Deactivate.
- The user sees “Account deactivated” on next login attempt.
- To reactivate, find the user in Manage User and click Activate.
Use deactivation when a team member leaves — deactivate rather than delete to preserve their historical tally and consignment records.
Deleting a User
Deletion permanently removes login access. Historical records (tallies, consignments) created by that user are preserved but the user account is gone. This action cannot be undone — use deactivation instead unless permanent removal is required.
Menu Visibility
The sidebar menu each user sees is based on their role and permissions. If a user says they cannot see a menu item:
- Check their permissions in Manage User (does the relevant permission exist?).
- Check their role (USER-role members need explicit permissions; ADMIN sees everything).
- If permissions look correct, ask the user to log out and back in to refresh their menu.
Mobile View
Manage User is responsive — tables and controls remain available with scrollable layouts on smaller screens.