
RBAC & Access Roles — User Manual
Also searched as: permissions, roles, access control, who can do what, manage roles, restrict access, user access levels, custom access, access role, detach and customize.
What is RBAC?
RBAC (Role-Based Access Control) is LumberLinq’s system for controlling which parts of the application each team member can access. Without RBAC, every USER-role account has broad access based only on their role tier. With RBAC enabled, an administrator can restrict a specific user so they can, for example, only access their tally sheets and nothing else, or view Reports without being able to edit any records. ADMIN and SUPER_ADMIN accounts always bypass RBAC and see everything, regardless of its on/off state.
How to Access RBAC Settings
Open Main Menu → Company → Access Control. Requires Administrator role.
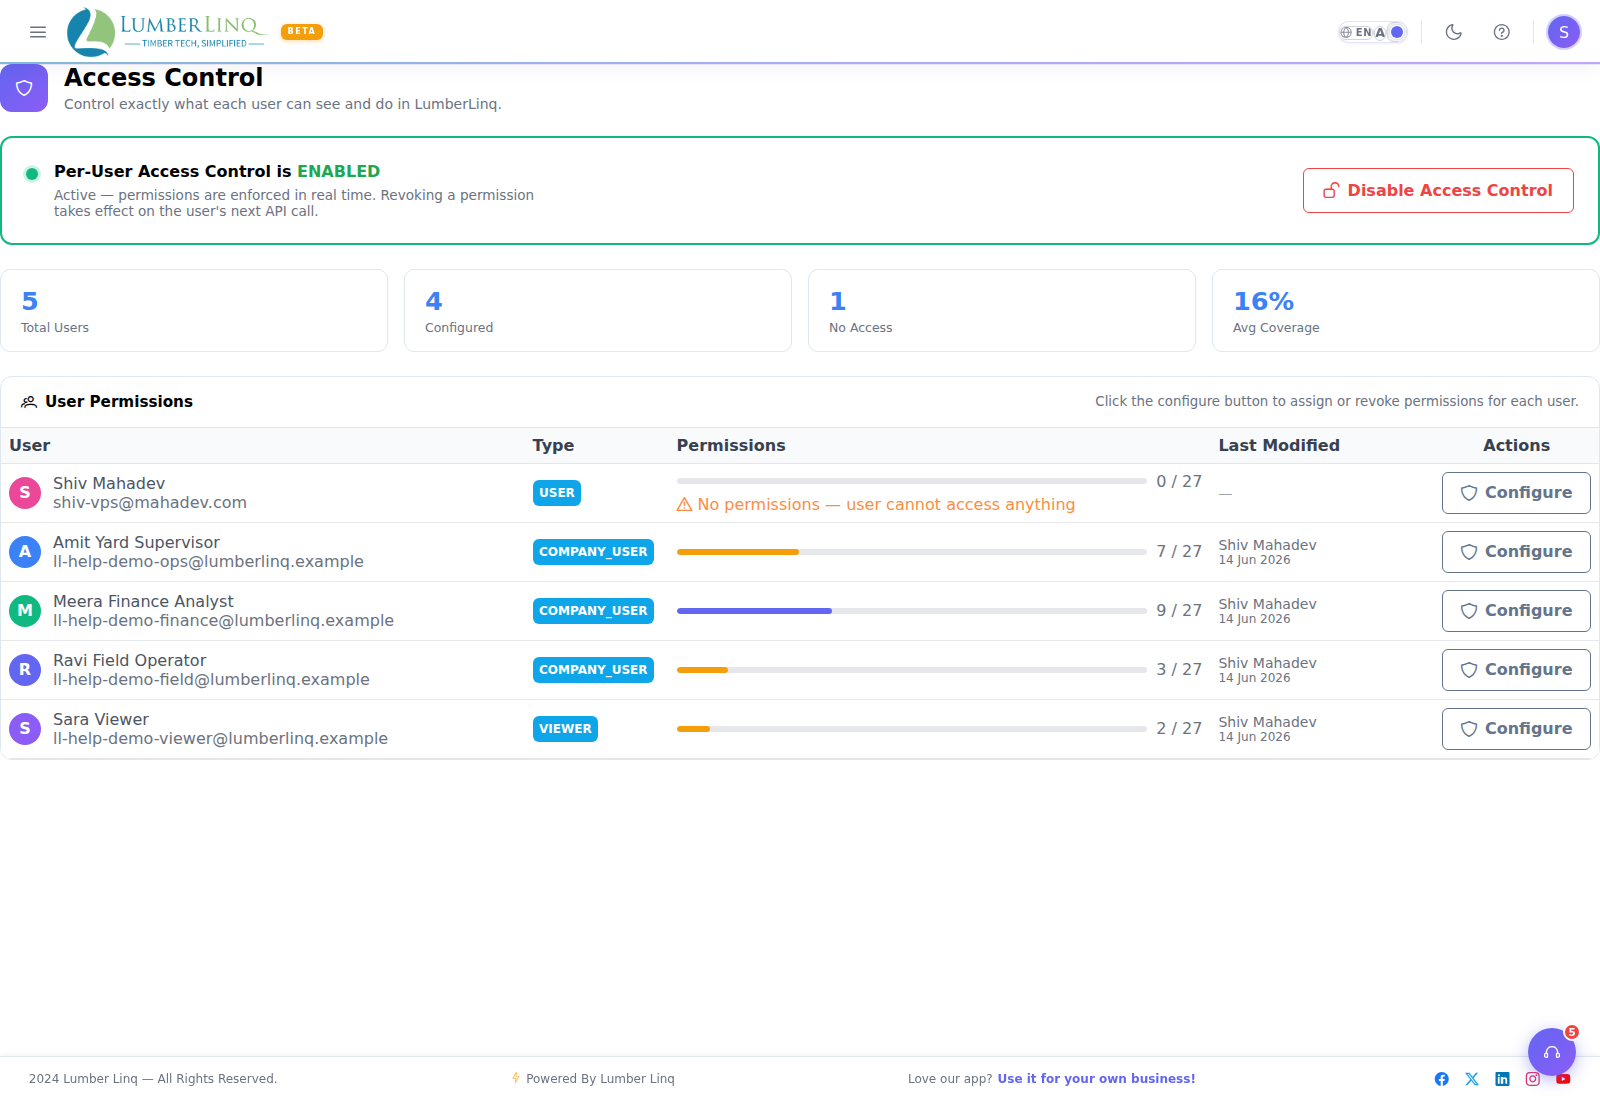
The RBAC Settings Page
The page opens with a master on/off toggle showing current status. When RBAC is off, a short explainer and an Enable button are shown. When RBAC is on, two tabs appear: User Permissions and Roles.
User Permissions Tab
Lists every team member with a stats strip (total users, how many are configured, how many have no access yet, average permission coverage). Click Configure on a user’s row to open their Access Rights panel and toggle individual permissions.
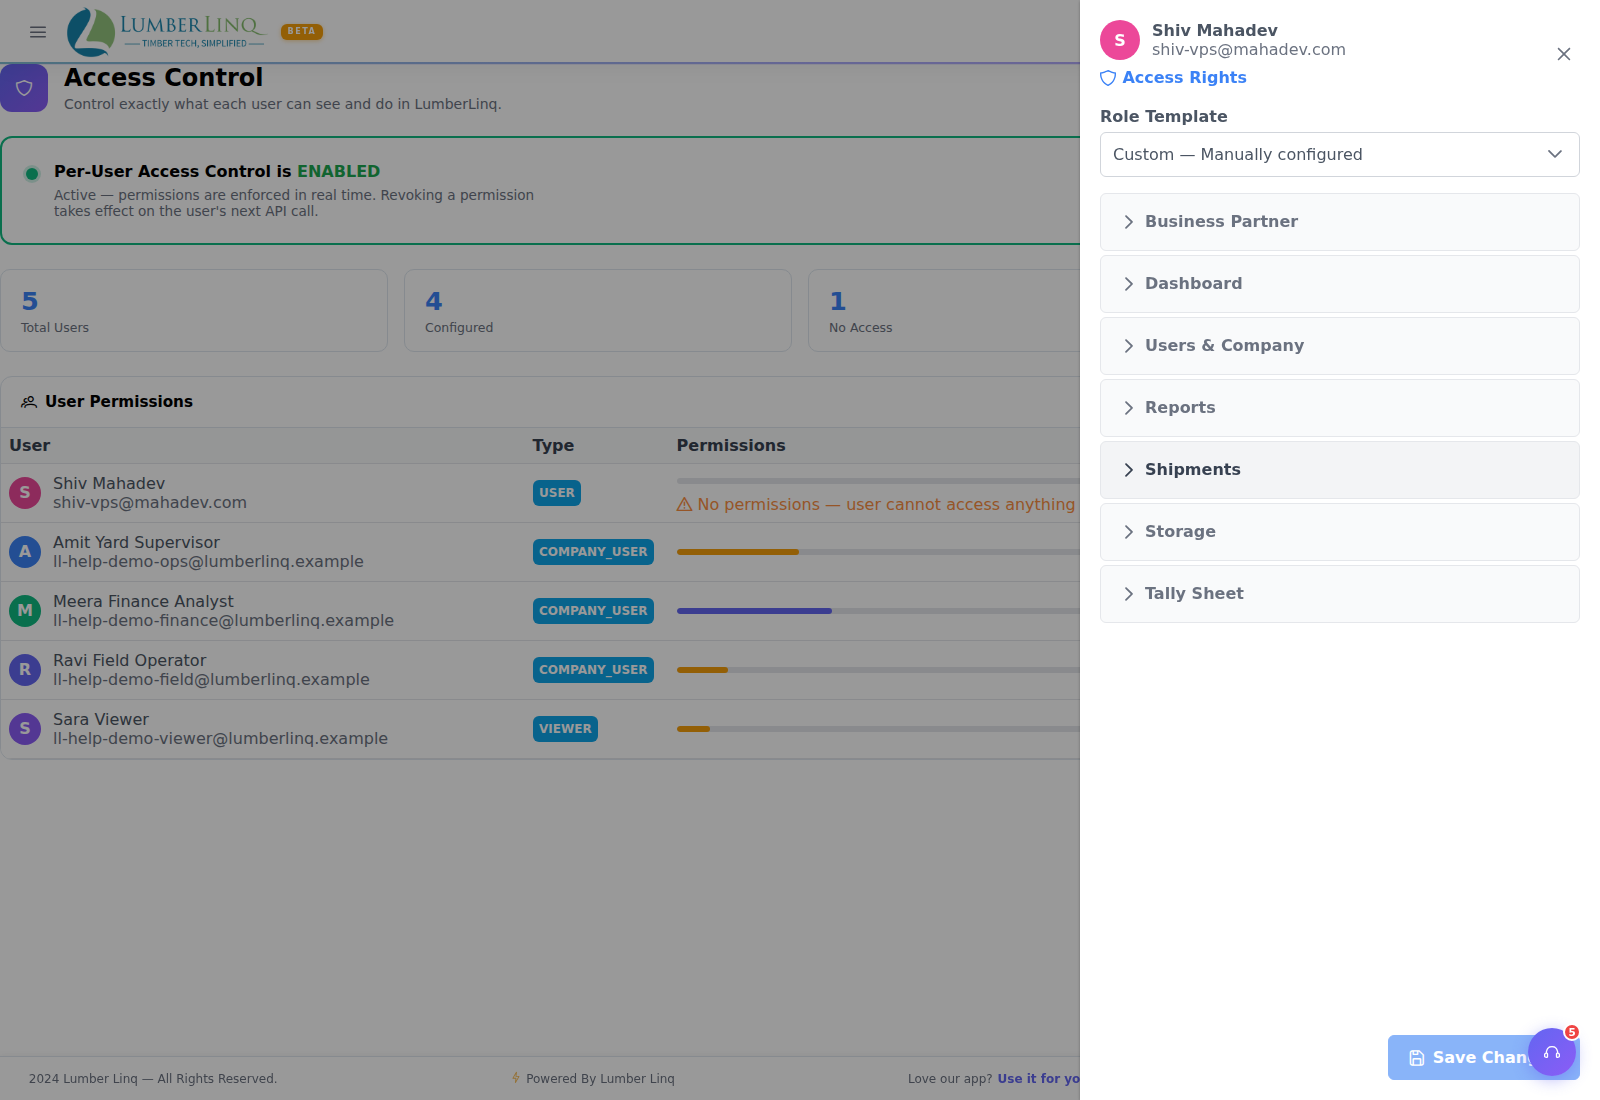
The Access Rights Panel — Permission Modules
Permissions are grouped into 12 modules, each expandable with Enable all / Disable all links and per-permission toggles: Dashboard, Tally Sheet, Consignments, Business Partner, Products, Locations, Reports, Storage, Inventory, Process, Support, Users & Company. Save applies immediately on the user’s next page load — they don’t need to log out.
How to Change One User’s Permissions Directly
- Open Main Menu → Company → Access Control and make sure RBAC is turned on.
- On the User Permissions tab, find the user in the list (use the search/scroll if needed).
- Click Configure on their row. Their Access Rights panel opens on the right.
- If the panel shows an Access managed by role banner, this user’s permissions currently follow a named role — click Detach & Customize first if you want to set permissions for this one person only, instead of changing the shared role.
- Expand the module you want to change (e.g. Business Partner, Reports).
- Toggle individual permissions on or off, or use the Enable all / Disable all links to set a whole module at once.
- Repeat for any other modules.
- Click Save Changes at the bottom of the panel.
The change applies immediately — the user does not need to log out or refresh for it to take effect on their next action.
Roles Tab — Creating a Reusable Access Role
Instead of configuring permissions one user at a time, create a named Access Role once — e.g. “Accountant” or “Yard Supervisor” — with a chosen set of permissions, then assign it to any number of users. Editing a role updates every user currently assigned to it immediately. A role can’t be deleted while users are still assigned to it — reassign or clear those users first.
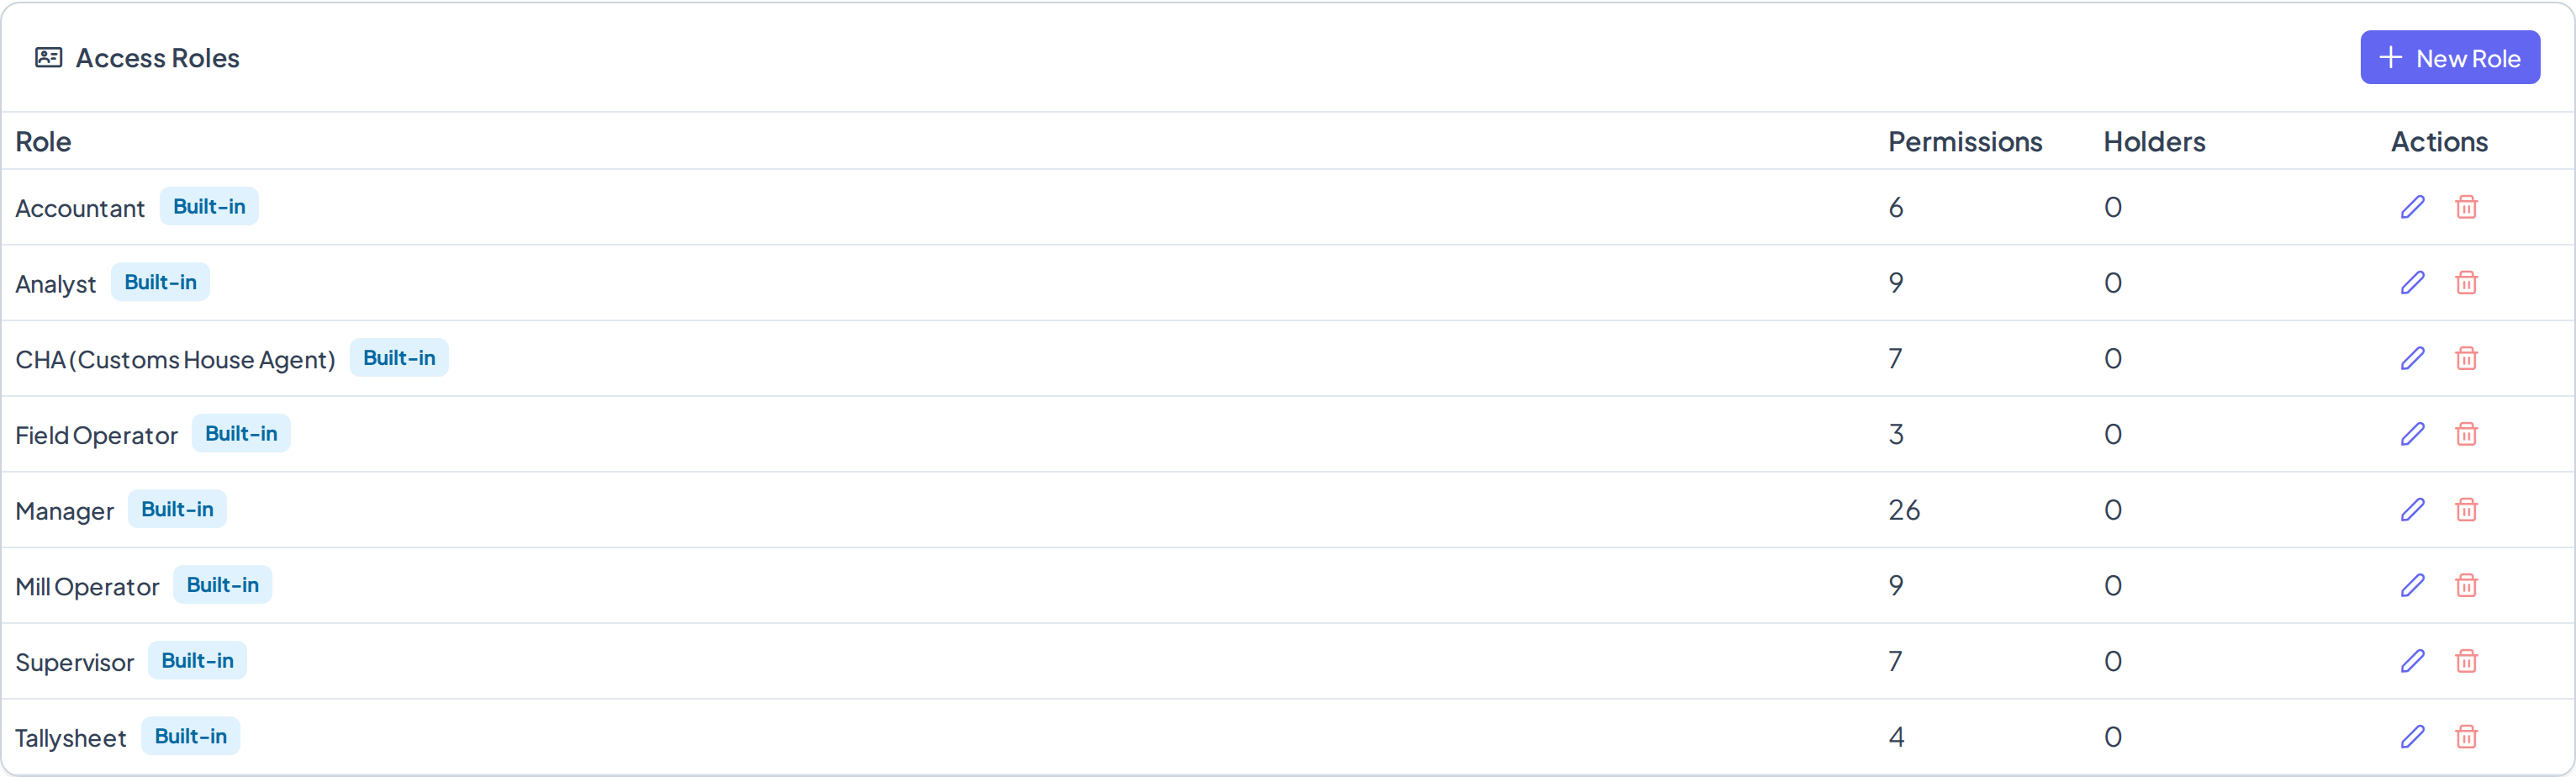
How to Create a New Access Role
- Open Main Menu → Company → Access Control and make sure RBAC is turned on.
- Click the Roles tab.
- Click New Role.
- Type a name for the role (e.g. “Accountant” or “Yard Supervisor”).
- Expand each module you want the role to cover and tick the permissions it should include, or use Enable all / Disable all to set a whole module at once.
- Click Save Role.
The new role now appears in the Roles list and is ready to assign to users.
How to Assign a Role to a User
You can assign a role either while inviting a new user, or at any time afterwards for a user who is already on the team.
At invite time:
- Open Main Menu → User → Manage User.
- Click Invite User.
- Enter the email address(es) to invite.
- In the Role dropdown, select the Access Role you want them to start with. Selecting Custom Access instead lets you hand-pick permissions just for this invite, without creating a reusable role.
- Send the invite.
After the fact, for an existing user:
- Open Main Menu → Company → Access Control.
- On the User Permissions tab, click Configure on the user’s row.
- In the Assign Role dropdown, select the role to apply. This takes effect immediately.
- Selecting Custom — Manually configured instead switches the user back to their own individually-configured permissions.
While a user is assigned to a role, their permission toggles in the Access Rights panel are locked (read-only) and follow whatever the role defines — use Detach & Customize if that one user needs a permanent exception.
How to Edit an Existing Role’s Permissions
- Open Main Menu → Company → Access Control → Roles tab.
- Click the pencil (edit) icon on the role’s row.
- Tick or untick permissions as needed.
- Click Save Role.
Every user currently assigned to this role is updated immediately — no need to touch each user individually.
How to Delete a Role
- Open Main Menu → Company → Access Control → Roles tab.
- Click the trash (delete) icon on the role’s row.
- If the role still has users assigned, deletion is blocked — first reassign or clear those users from Main Menu → User → Manage User, then try again.
Disabling RBAC
Disabling RBAC immediately gives all users broad access based on their role tier. Previously configured permissions and Access Roles are preserved in the database, not deleted — re-enabling RBAC restores everything exactly as it was.
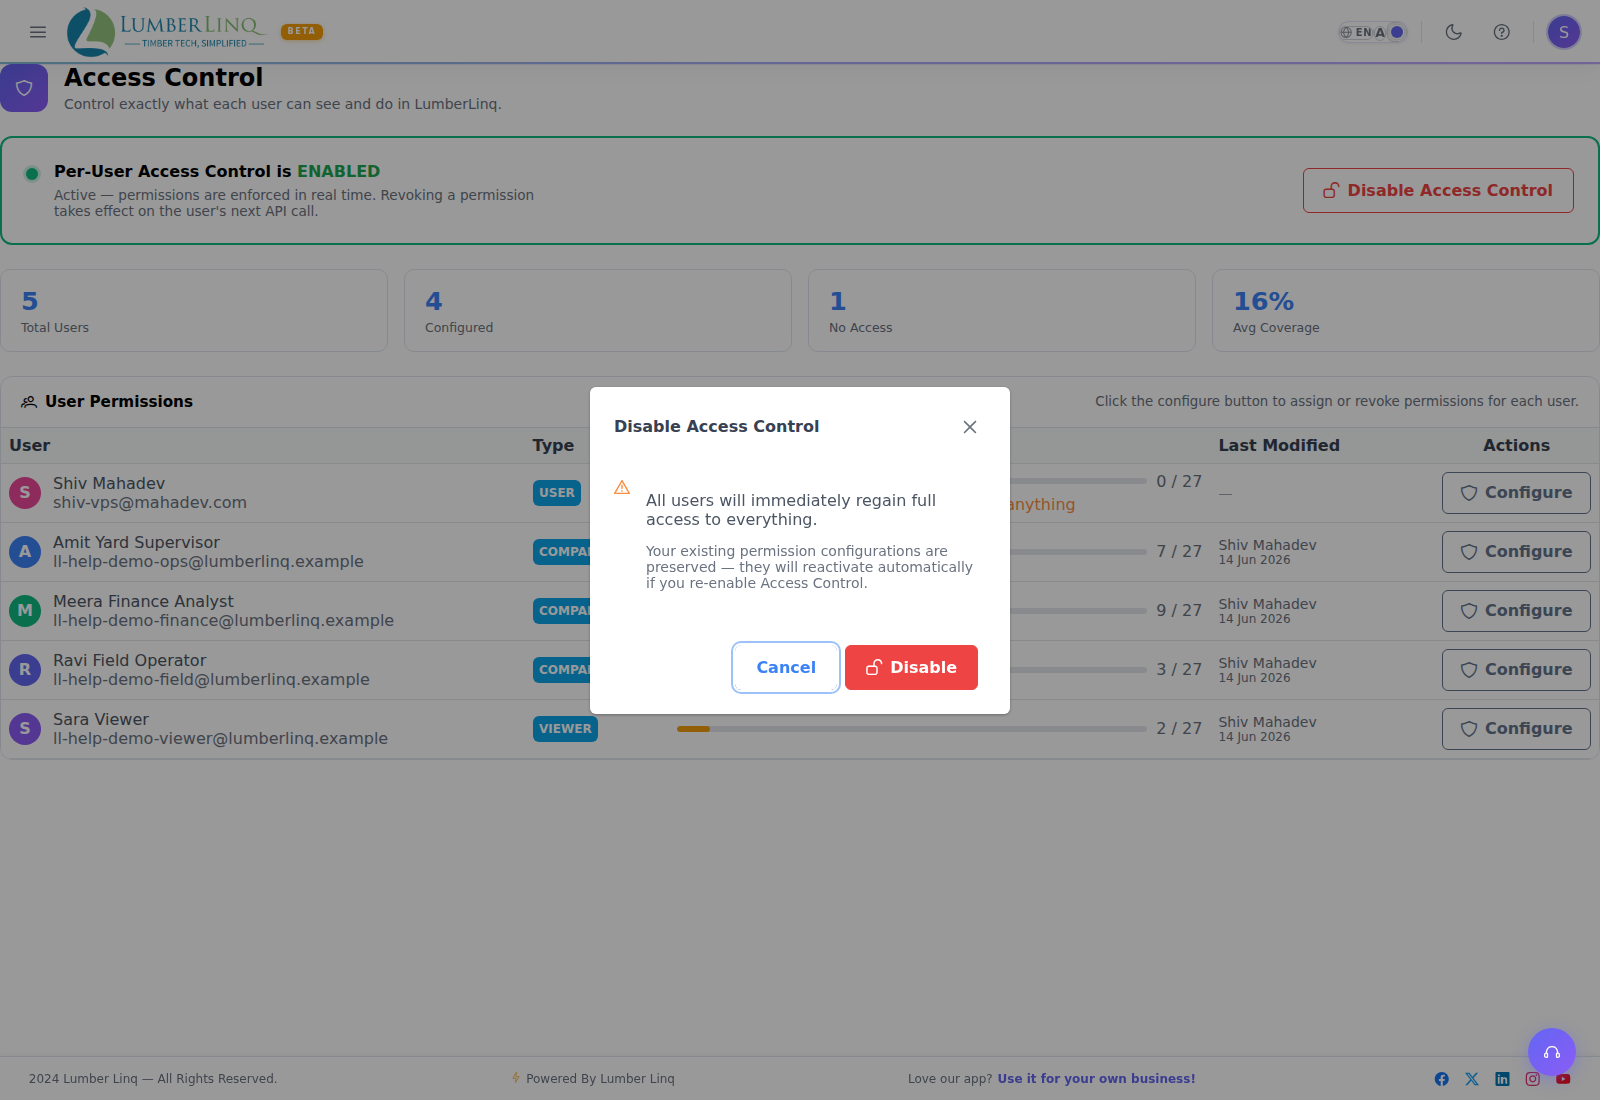
How RBAC Connects to Other Modules
RBAC governs which sidebar menu items and module actions each user can see across the entire app — a user without the Consignments module enabled won’t see the Consignments menu item at all, regardless of any other setting. See the User Management guide for inviting users and setting their initial role.